The wonderful Let's Encrypt makes it easy to easy to generate and install SSL certificates for free using the certbot ACME client on a webserver. But what if, like me, you want to generate and install your certs on a server behind a firewall so that you can use subdomains in your home network while keeping that network private.
Yep, they make that easy too because certbot supports dns challenge as a method of verifying your ownership of a domain and provides dns plugins for every major DNS provider.
How DNS challenge works with certbot
The certbot docs provide a much better explanation of this than I ever could but TLDR:
- Certbot requests a certificate from the Let's Encrypt servers
- Let's Encrypt servers return challenge contents
- Plugin creates a TXT DNS record containing the challenge contents
- Let's Encrypt servers validate the TXT DNS record
- Let's Encrypt servers issue certificate
Let's use docker
In my case I use Cloudflare as my DNS provider and I'm going to generate the cert on my trusty Synology NAS. Now I could manually install certbot, it's dependencies and the Cloudflare plugin, but the Synology has Docker installed and there's a Docker image for the Cloudflare plugin so that's much simpler.
Getting started
The docker image needs to match a couple of letsencrypt volumes inside /var/lib and /etc/ so we'll start by creating them.
sudo mkdir /etc/letsencrypt
sudo mkdir /var/lib/letsencrypt
Set up Cloudflare credentials
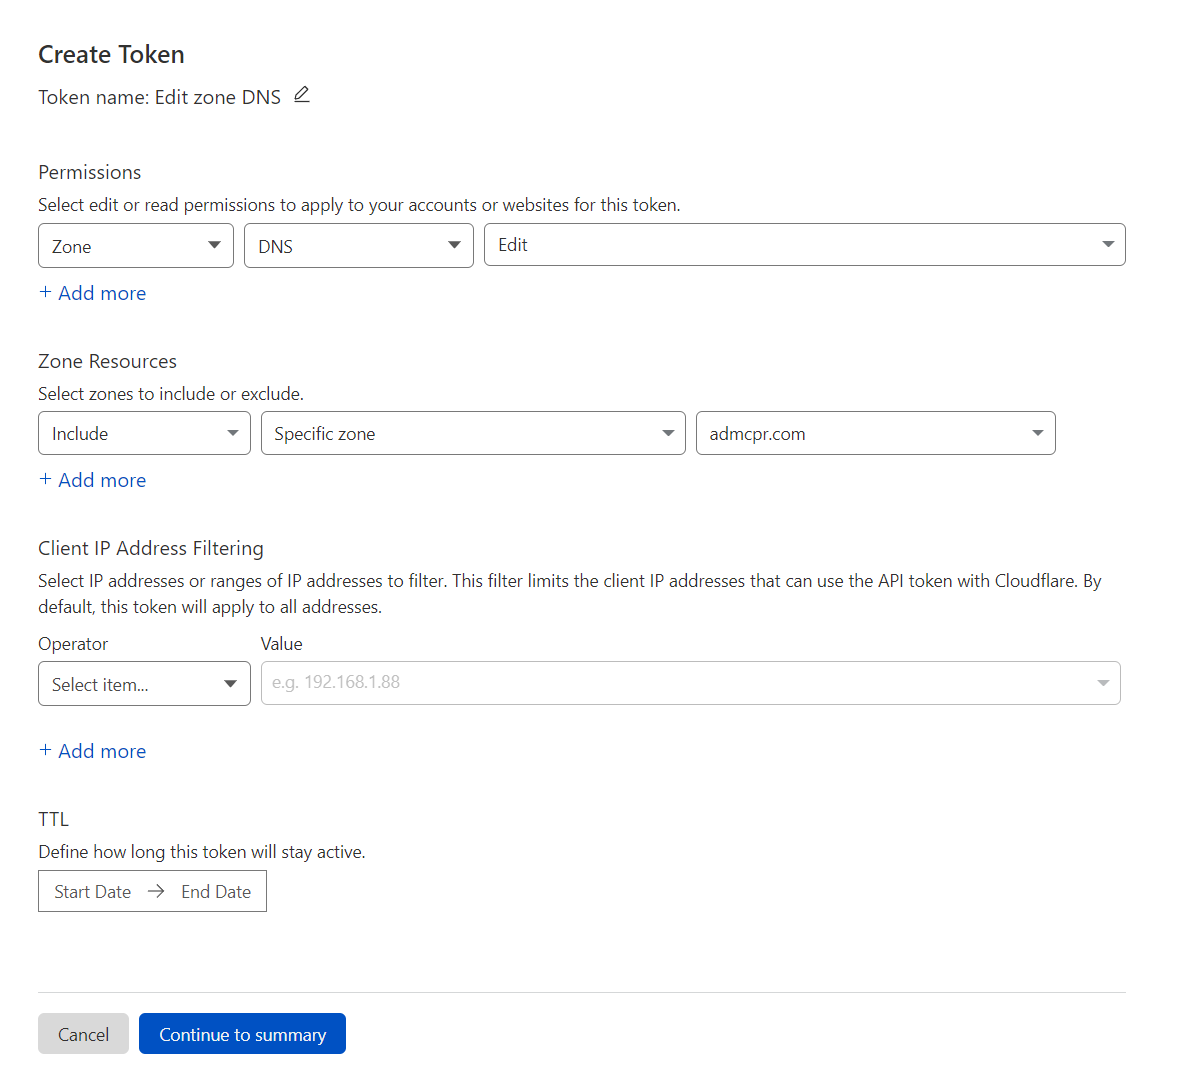
To enable certbot to create TXT records via the Cloudflare API we'll need to create an API token via the cloudflare dashboard. We choose to create a token and select the Edit zone DNS template and create the token for my domain.
Now we have the token let's create a cloudflare.ini file that certbot will read the token from.
sudo vi /etc/letsencrypt/cloudflare.iniThe file contents should have the following format.
# Cloudflare API token used by Certbot
dns_cloudflare_api_token = 0123456789abcdef0123456789abcdef01234567Now we can run the docker container passing in the location of the ini file containing the api token and the name of the domain to generate a certificate for. I'm using *.admcpr.com to generate a wildcard cert so I can use this cert for lots of different subdomains in my local network.
sudo docker run -it --rm --name certbot \
            -v "/etc/letsencrypt:/etc/letsencrypt" \
            -v "/var/lib/letsencrypt:/var/lib/letsencrypt" \
            certbot/dns-cloudflare \
            certonly --dns-cloudflare \
                     --dns-cloudflare-credentials /etc/letsencrypt/cloudflare.ini \
                     -d *.admcpr.com
Once this command completes the cert can be found in /etc/letsencrypt/live/$domain where $domain is the name of the domain the cert was generated for, so for me that's /etc/letsencrypt/live/admcpr.com. Now we can grab that cert and install it wherever we want to have SSL on a subdomain.
Next steps
Let's Encrypt certs are valid for 3 months so I'll need to setup some way to automate renewal and find a more secure place to store the Cloudflare API key.