Cascadia Code is a new monospaced font designed to work nicely with the new Windows Terminal. Unfortunately, it doesn't yet include the Powerline symbols necessary to make my terminal look as shiny as I like it. Fortunately the awesome Scott Hanselman wrote a how to post on Patching the new Cascadia Code to include Powerline Glyphs and other Nerd Fonts for the Windows Terminal so now my Windows Terminal looks just the way I want it.

Since the development of Cascadia is pretty rapid I thought it would be nice to do this automatically and package up the resulting patched font so I set out to configure a GitHub Action, my new favourite automation tool, to do just that.
Step 1 - Download the latest version of Cascadia
Fortunately, the GitHub API makes it easy to grab the latest release from any repo, just append releases/latest/download to the path of the repository. So, we can get the latest release using a simple curl command.
curl -L https://github.com/microsoft/cascadia-code/releases/latest/download/Cascadia.ttf --output Delugia.ttf
Step 2 - Install FontForge
FontForge is a free and open source font editor brought to you by a community of fellow type lovers.
FontForge is a free and open source font editor which exposes its functionality as a Python module we can install it using Apt.
sudo add-apt-repository ppa:fontforge/fontforge -y -u;
sudo apt-get install fontforge -y;
Step 3 - Change the fontname, fontfamilyname, copyright etc.
You might have noticed in step 1 that I downloaded Cascadia with the name Delugia.ttf. Since the Cascadia name is copyrighted and I'm messing with it and re-distributing then it's only polite to rename the font and remove the original copyright notice. Thanks to FontForge's Python module this can be done easily in a script.
import fontforge

name="Delugia"
file_name="./{}.ttf".format(name)

# Open the file
delugia=fontforge.open(file_name)

# Rename the file
delugia.fontname=name
delugia.familyname=name
delugia.fullname=name
delugia.copyright=""

# Save
delugia.generate(file_name)
In case you're wondering the Delugia name came courtesy of Alistair Young.
Step 4 - Install Font Patcher
Font Patcher is part of the Nerd Fonts collection which provides tools, glyph collections, fonts and more for font hacking. It is a Python script that we can use with FontForge to patch a given font with programming and development related glyphs. So, let's download it with curl.
curl -L https://raw.githubusercontent.com/ryanoasis/nerd-fonts/master/font-patcher --output font-patcherStep 5 - Download the source fonts
We'll also need to grab the fonts that Font Patcher pull the glyphs from so let's download them too.
curl -L https://github.com/ryanoasis/nerd-fonts/blob/master/src/glyphs/PowerlineSymbols.otf?raw=true --output src/glyphs/PowerlineSymbols.otf

curl -L https://github.com/ryanoasis/nerd-fonts/blob/master/src/glyphs/Symbols%20Template%201000%20em.ttf?raw=true --output "src/glyphs/Symbols Template 1000 em.ttf"

etc...
Nerd Fonts Font Patcher: patches a given font with programming and development related glyphsStep 6 - Install ConfigParser
One last yak-shaving step and we're ready to patch some fonts! Font Patcher depends on the ConfigParser module so we'll install PIP and use PIP to install the module.
sudo apt install python-pip -y
pip install configparser
Step 7 - Patch
We've taken a lot of steps to get here but now patching our Delugia font to add Powerline glyphs is as easy as one command line.
fontforge -script font-patcher --powerline --no-progressbars Delugia.ttfI make use of the no-progressbars switch because the Action was failing like this when it tries to display the progressbar, I suspect there's a unicode bug there somewhere but didn't have time to investigate.
And I can add the complete set of Nerd Font glyphs like this.
fontforge -script font-patcher -c --no-progressbars Delugia.ttfStep 8 - Upload artifacts
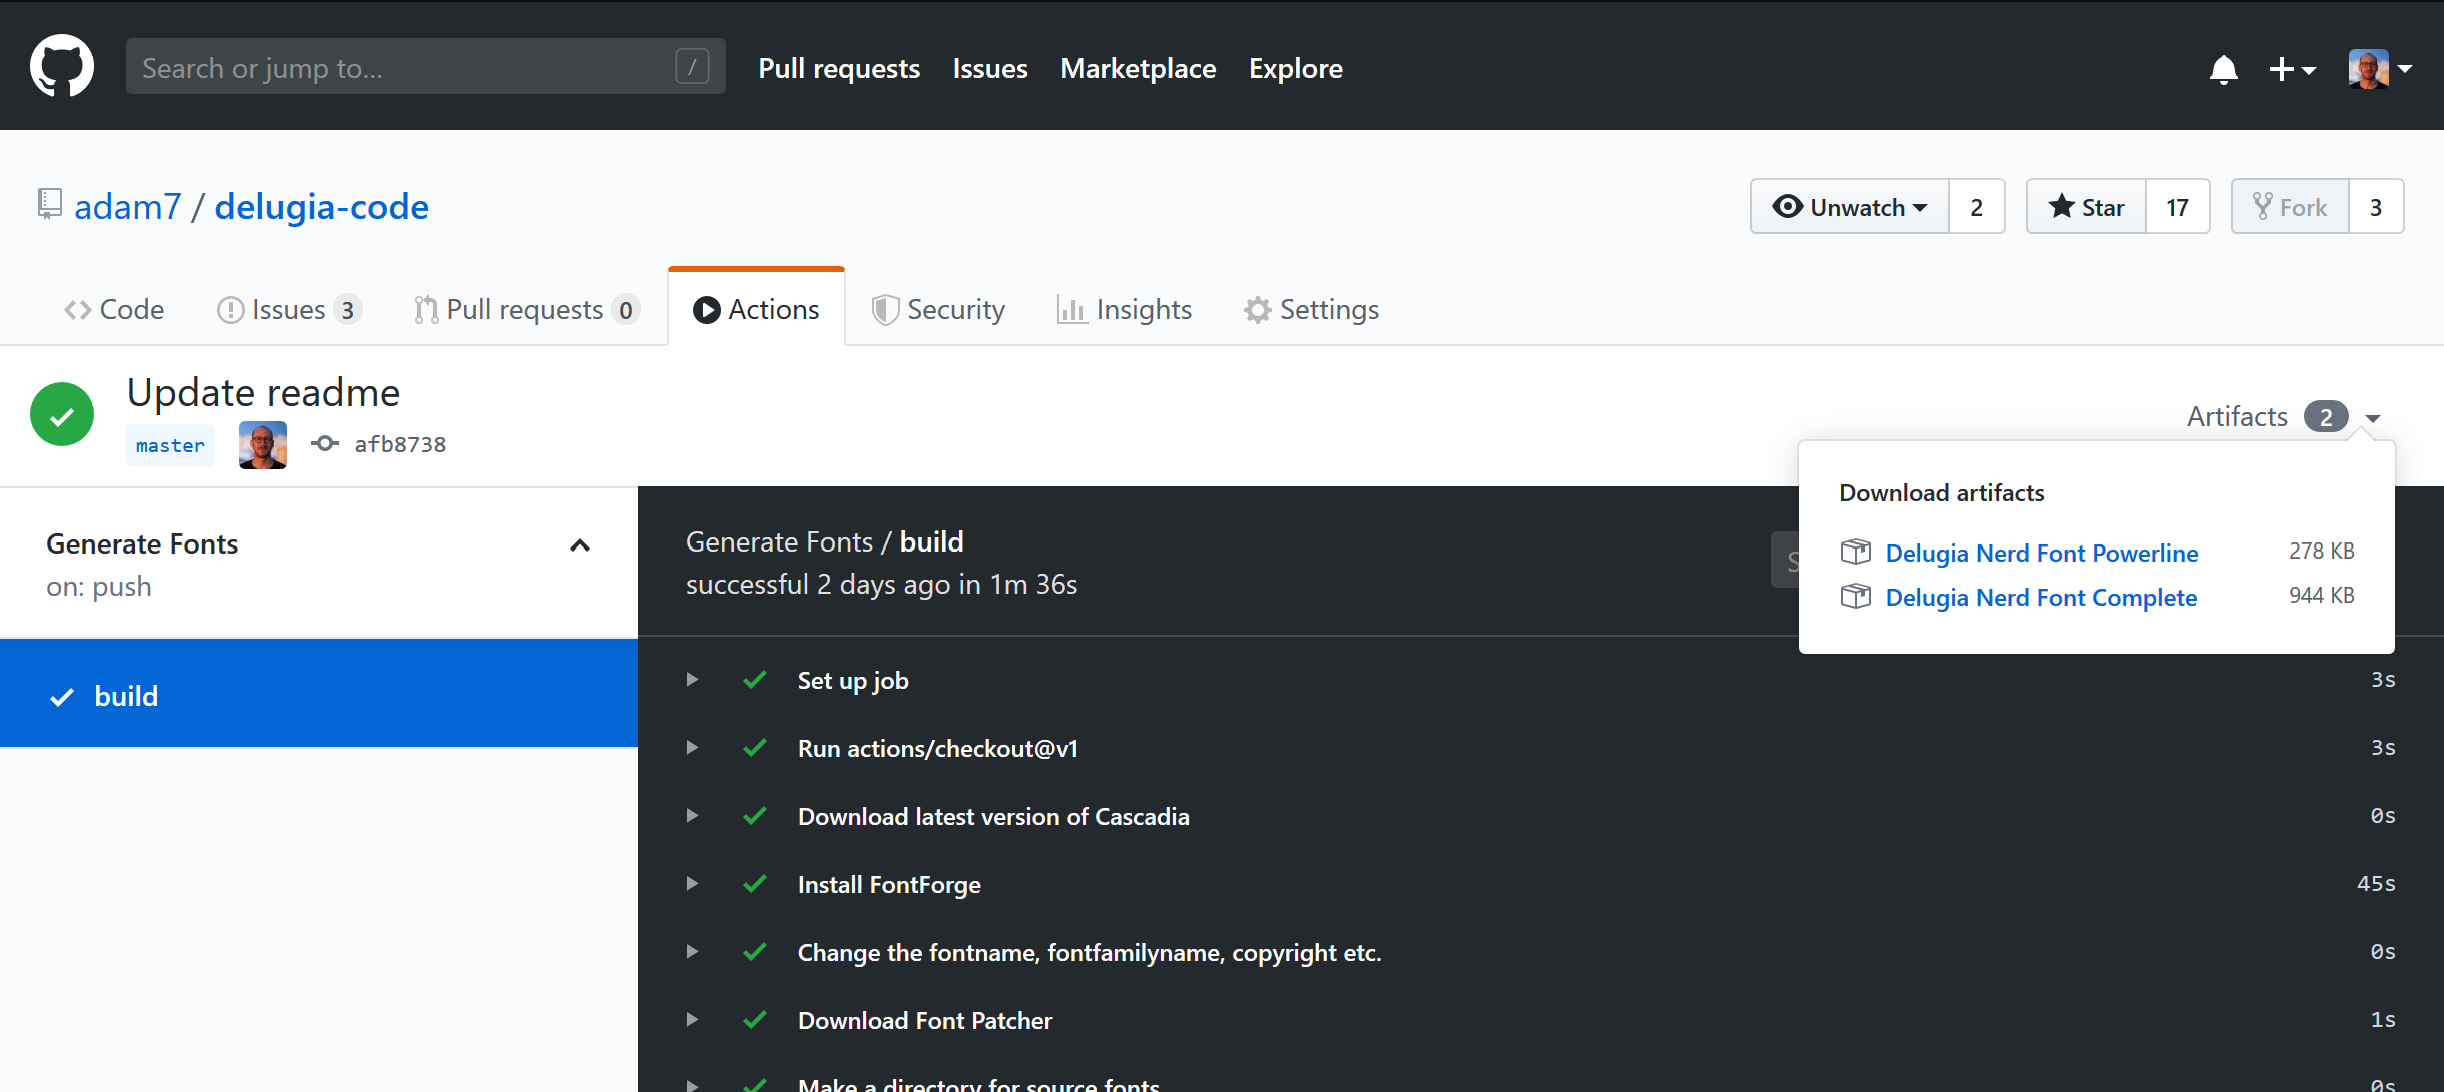
Every time my GitHub action completes, I want to make the generated fonts available as build artifacts and, fortunately, there's an action for that.

Using it is as easy as referencing the action and specifying the file to be uploaded.
- uses: actions/upload-artifact@master
  with:
    name: Delugia Nerd Font Powerline
    path: "Delugia Nerd Font.ttf"
- uses: actions/upload-artifact@master
  with:
    name: Delugia Nerd Font Complete
    path: "Delugia Nerd Font Complete.ttf"
Now for every successful run of the Action the fonts are attached as artifacts.
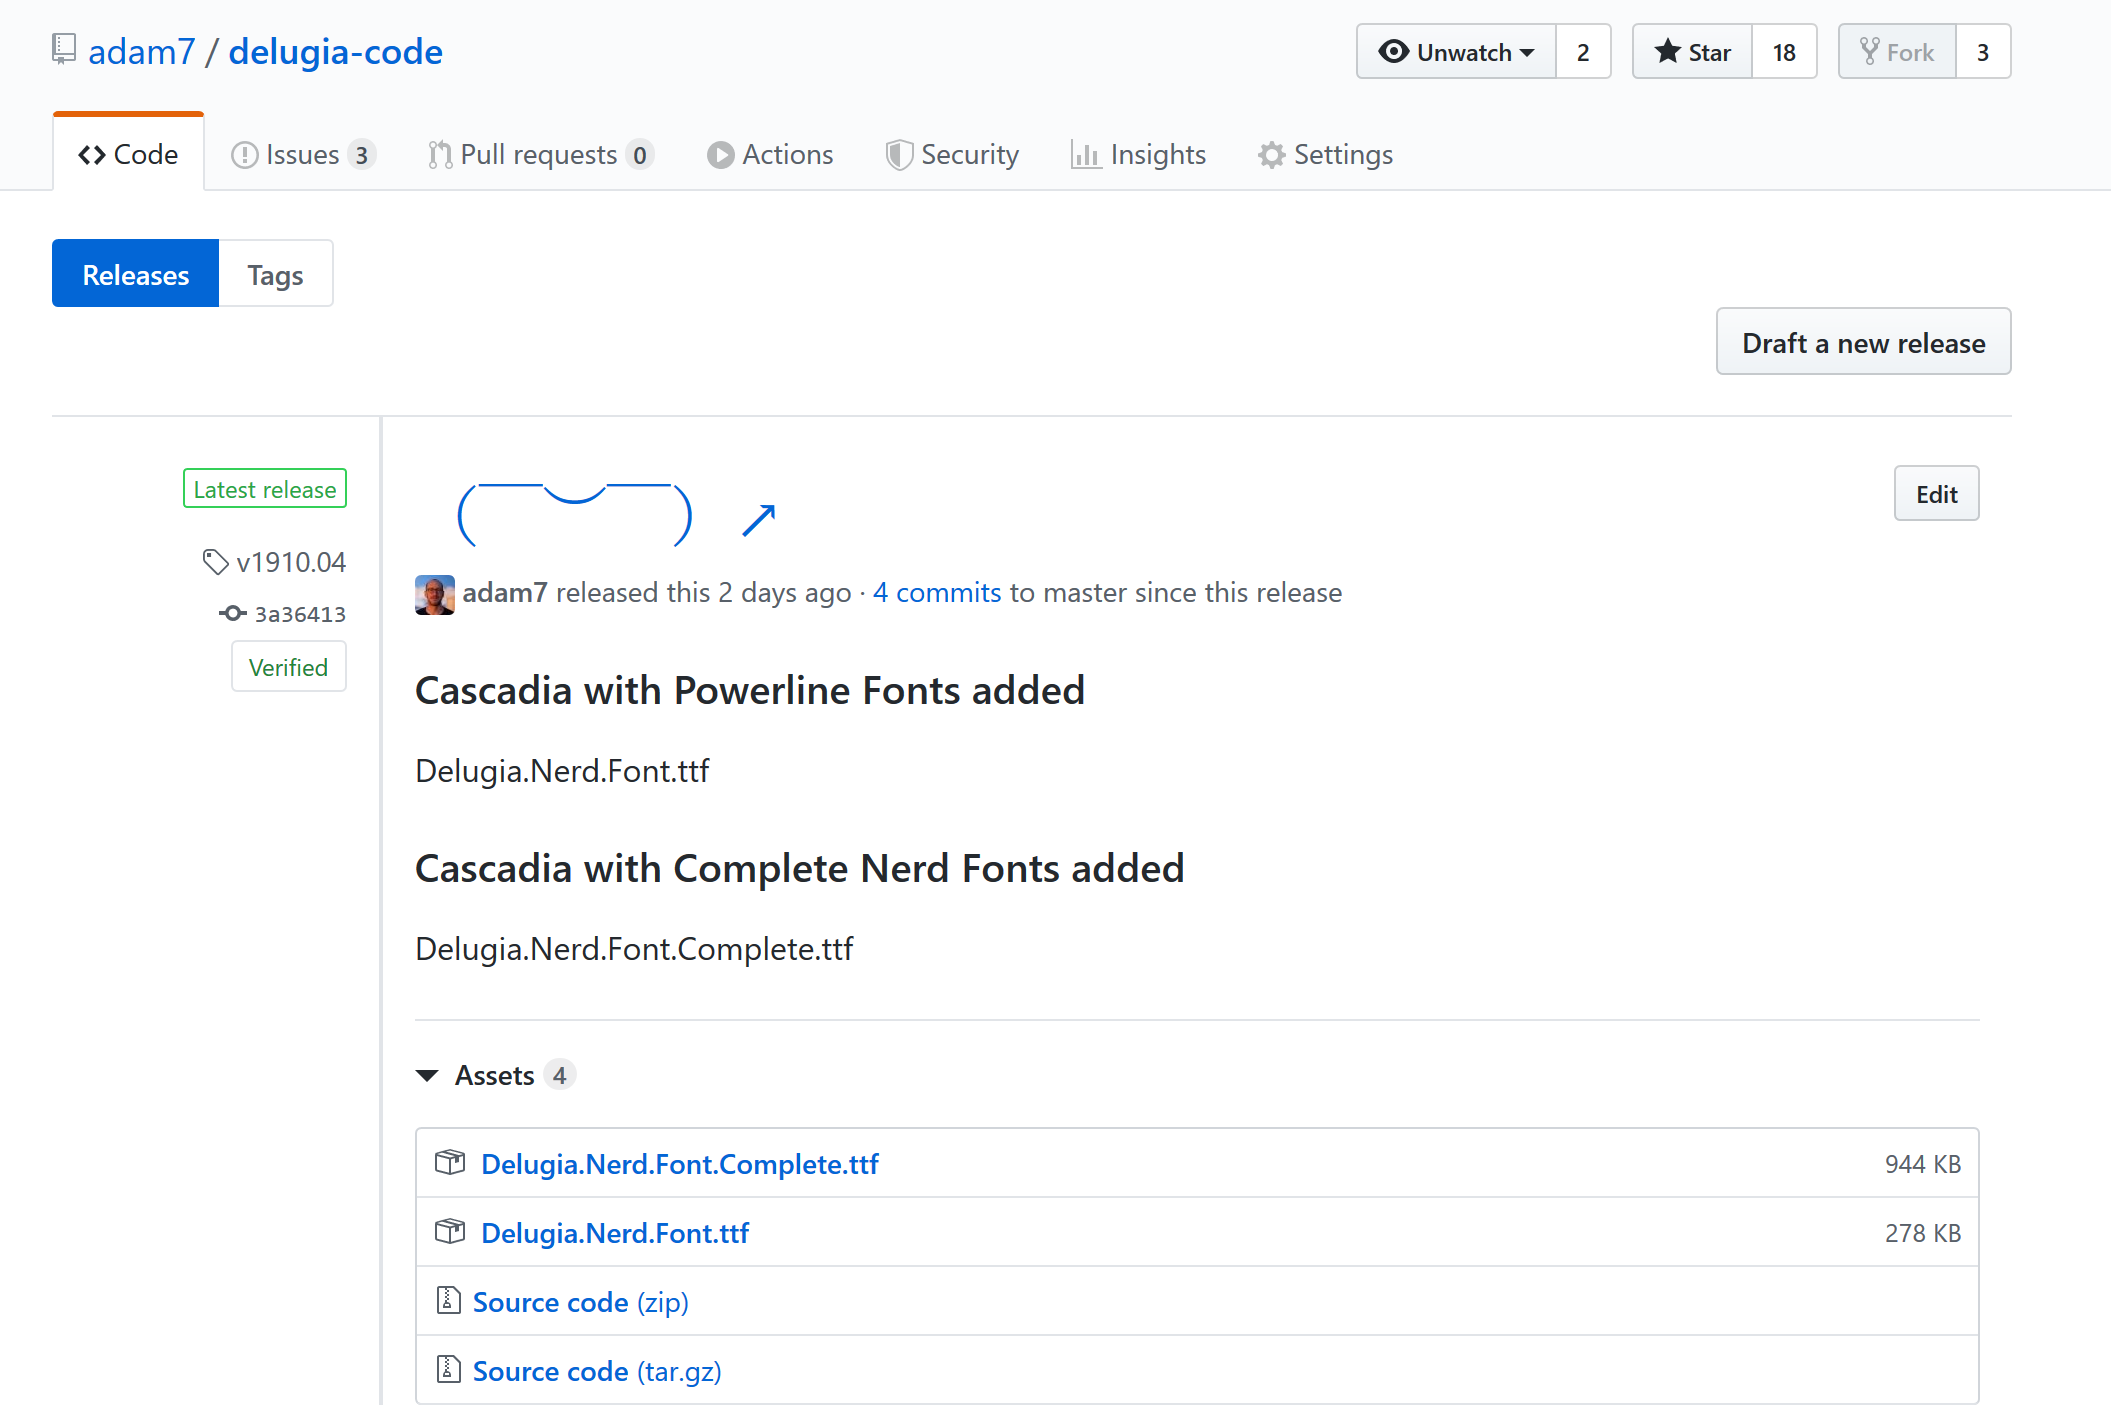
Step 9 - Create a release on tag
Finally, I want to automate creating a release and including the patched fonts whenever I tag a new version and conveniently Doug Tangren has created an Action that does just that.

I just have to reference the action, ensure it only runs when tags are pushed if: startsWith(github.ref, 'refs/tags/') and specify the files to be added to the release.
- name: Release
  uses: softprops/action-gh-release@v1
  if: startsWith(github.ref, 'refs/tags/')
  with:
    files: |
      Delugia Nerd Font.ttf
      Delugia Nerd Font Complete.ttf
  env:
    GITHUB_TOKEN: ${{ secrets.GITHUB_TOKEN }}
And now I can simply add a tag to generate and share my patched Delugia font from my repository's Releases page.
If you want to check out the repository itself, you'll find it here:

contributions welcome :)