Because I'm lucky enough to have an awesome brother I got the gift of Raspberry Pi for Christmas, more specifically a shiny Pi 4 with a whopping 4 gigs of RAM. There a huge selection of fun things to build using a pi but the first thing I wanted to try was running it as a tiny server and because I no longer own a usb keyboard or mouse I wanted to do that all headless. These are the steps that I took to go from zero to fully functional pi running headless on my home network.
Download OS image
First, I needed to download a Raspbian (the pi flavour or Debian) image from the downloads page, I chose Raspbian Buster Lite because I didn't need a full suite of desktop tools. I downloaded the .zip file and extracted the contents to get the .img file.
Flash image
Once the image was downloaded, I needed to write it to my SD card, so I grabbed balenaEtcher - an open source image flashing tool for Linux, macOS and Windows - from their download page. Etcher is delightfully simple and after running the executable I just had to select the image (my extracted Raspbian .img file) and the target (my microSD card). I also disabled Eject on success from Settings to avoid needing to remove and re-insert the SD card to add files to it in the next step.
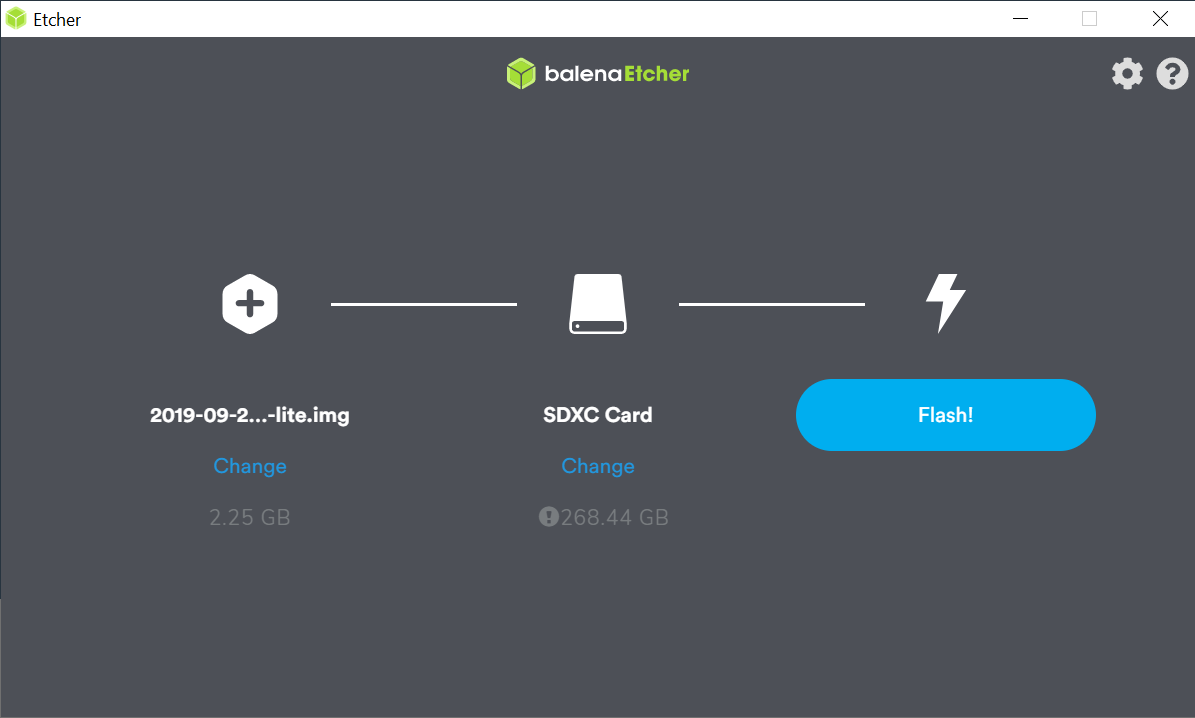
After clicking Flash! and waiting a couple of minutes Etcher had written the image to my SD card as a 256MB FAT32 boot partition and validated it. I now had a ready to boot SD card which if I insert into my pi and power it on will happily boot up but without remote access or Wi-Fi.
Enable SSH
To enable SSH I just had to create a file in the root of the boot partition with the filename ssh. When the pi boots up if it finds that file it will enable the SSH server and delete the file. The default credentials for connecting are:
user: pi
password: raspberry
Configure Wi-Fi
In order for the pi to connect to my Wi-Fi network I just needed to add a wpa_supplicant.conf file to the boot partition and populate it with Wi-Fi SSID and password, not forgetting to specify the Alpha 2 country code.
ctrl_interface=DIR=/var/run/wpa_supplicant GROUP=netdev
update_config=1
country=<Insert country code here>

network={
 ssid="<Name of your WiFi>"
 psk="<Password for your WiFi>"
}Initially connecting to the network failed with the pi not showing up on my router's list of DHCP devices, I found reports of issues connecting to 5 Ghz Wi-Fi networks so swapped to a 2.4 Ghz network and the pi showed up as expected.
Enable VNC
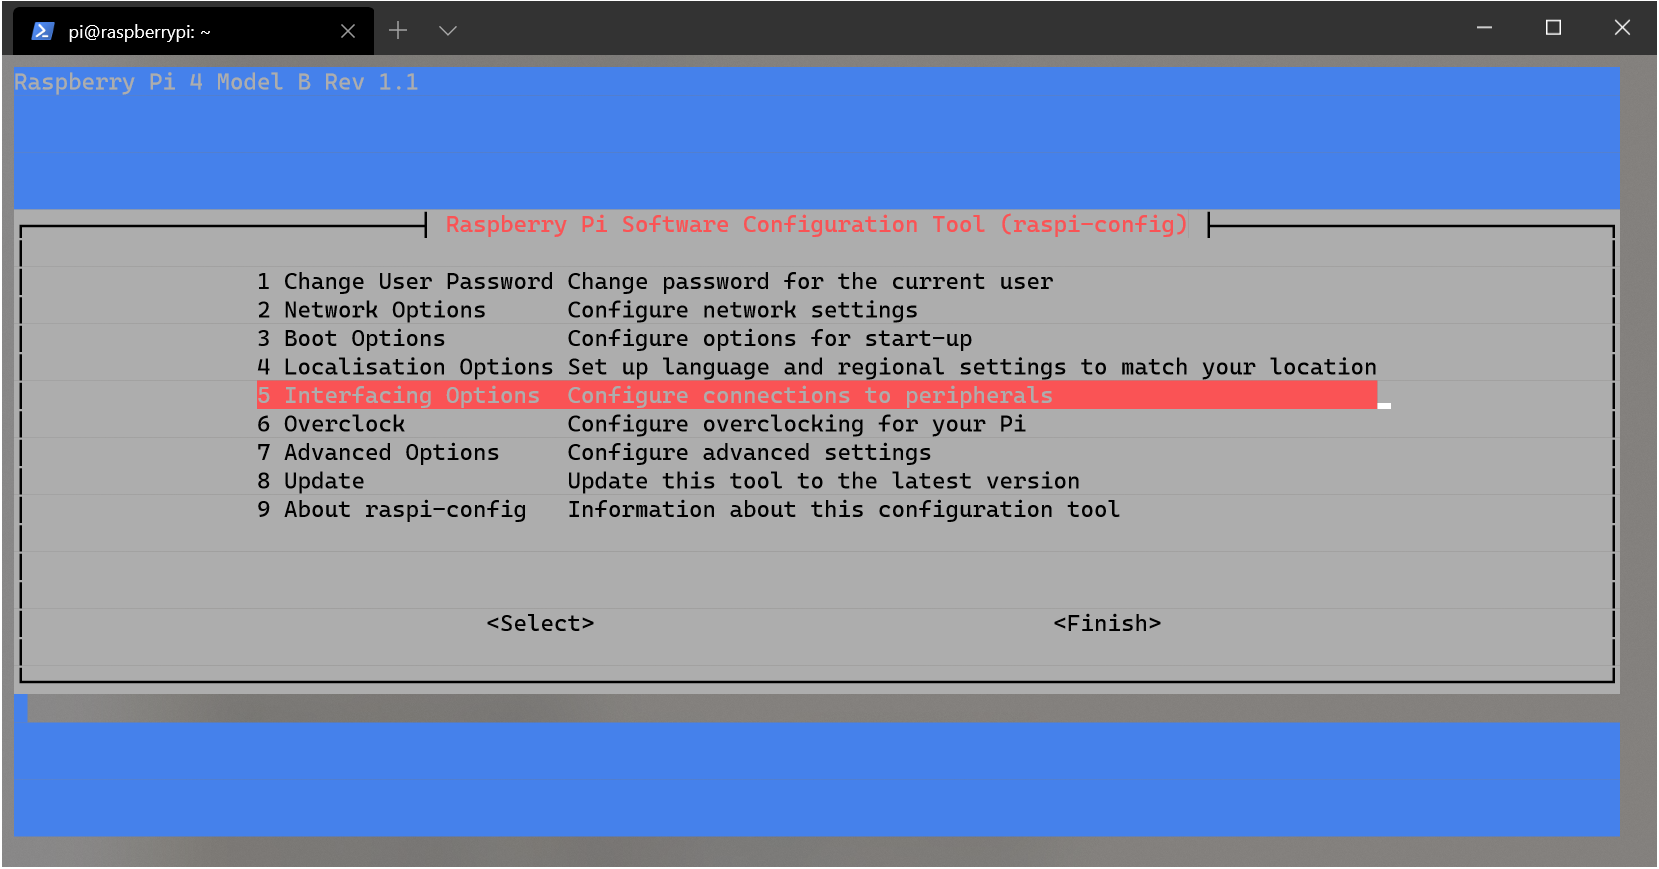
With ssh enabled and Wi-Fi configured I now had full access, but I also wanted remote desktop access. This was unnecessary for a server, however I wanted to try it out and fortunately Raspbian comes with VNC ready to go. I connected with ssh and made sure that VNC Connect was up to date.
sudo apt update
sudo apt install realvnc-vnc-server realvnc-vnc-viewerThen I ran raspi-config.
sudo raspi-configSelected Interfacing Options.
Selected VNC.
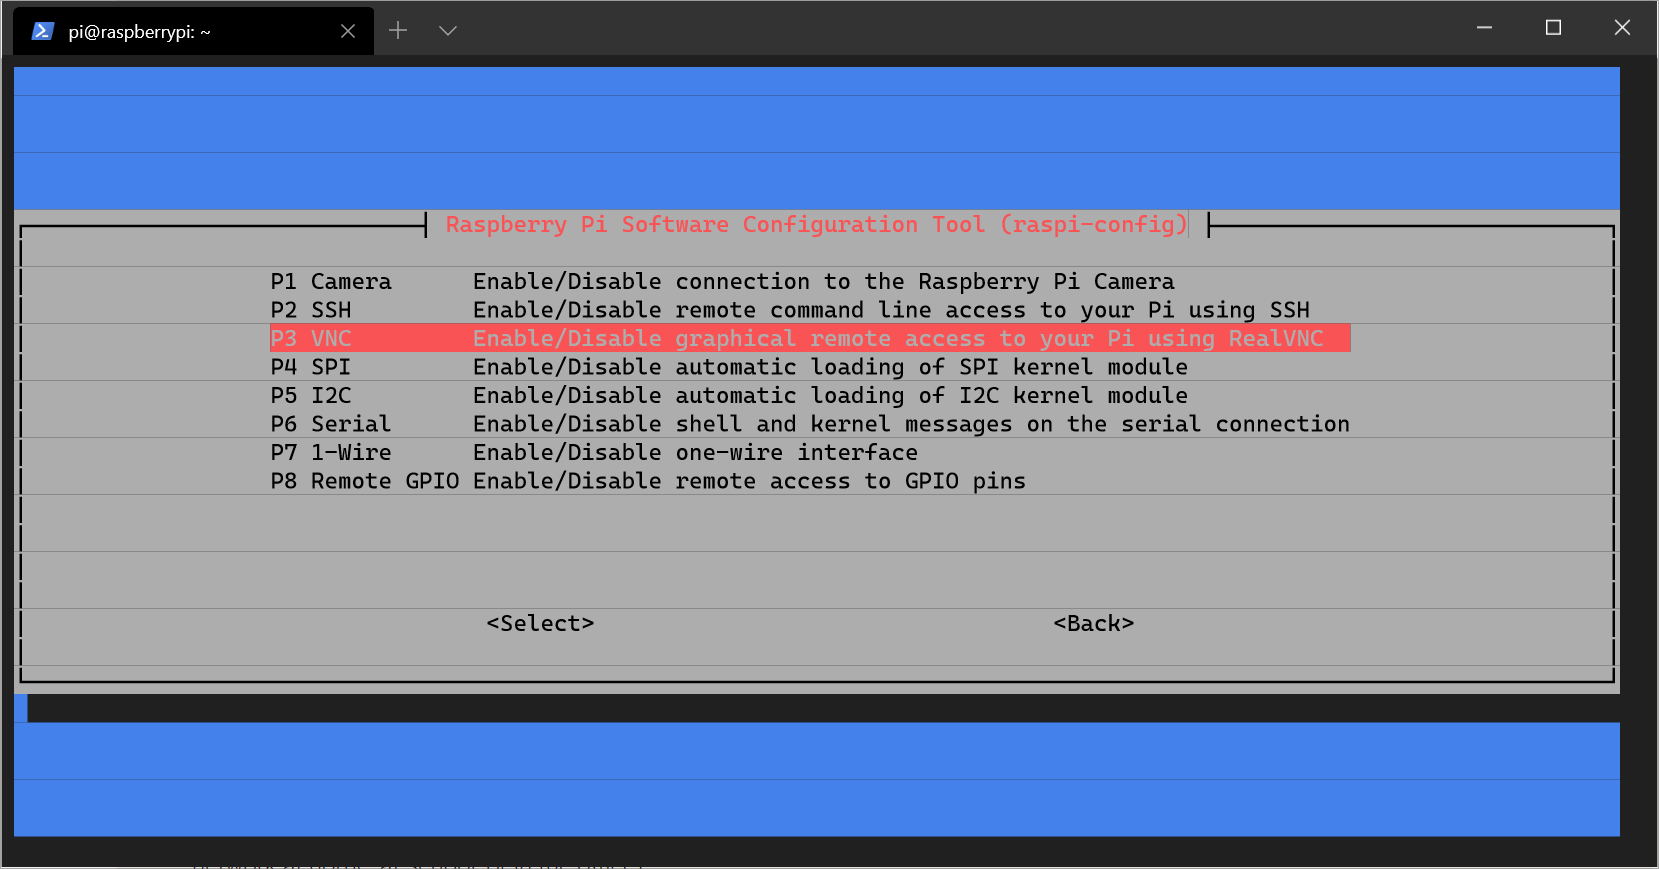
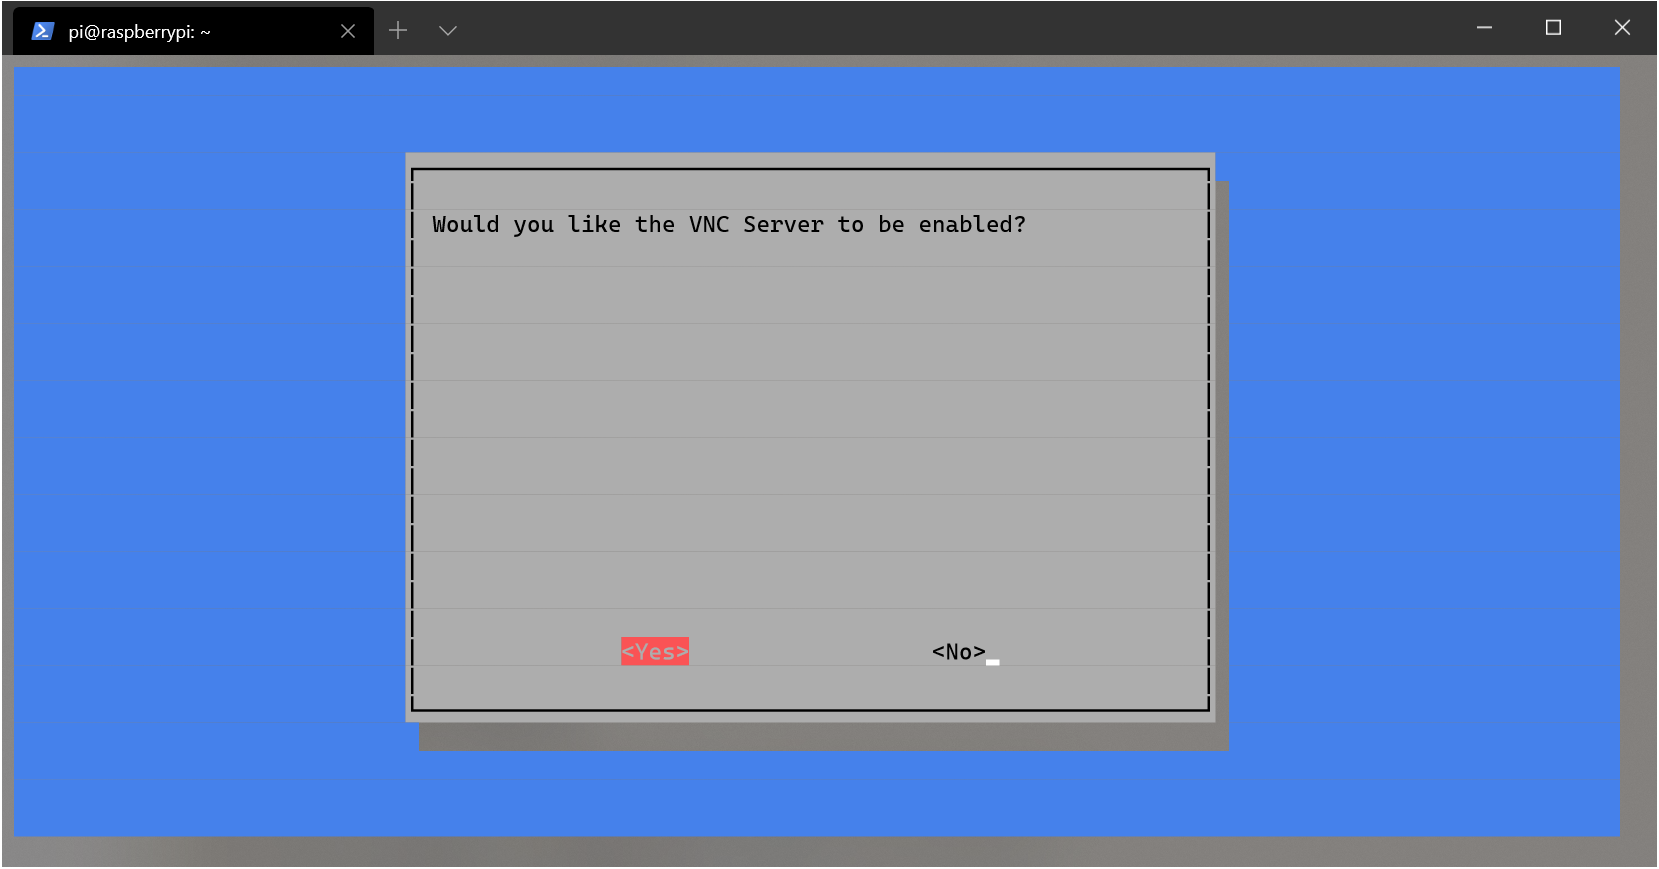
And selected Yes to enable the server.
I could now connect to the pi using VNC but when I did, I got the message Cannot currently show the desktop. This was because I didn't have a monitor connected so there was no screen resolution defined for the desktop. I ran raspi-config again selected Advanced Options -> Resolution and chose DMT Mode 35, you can choose any option other than Default to get things working, and after a reboot I had my headless pi up and running with SSH and VNC access. Now I just need to install k3s and turn my tiny server into a tiny Kubernetes cluster. 🌬